Everything You Need For Russian Manicure Style Prep
When it comes to achieving long-lasting, salon-quality Russian Manicure style prep, the prep is everything. Nail professionals know that the secret to a flawless finish starts before any product is applied — and with the right tools and training, your prep can truly elevate your results.
At MUSE, we’ve designed a range of professional EFile tools and accessories to help nail techs perform Russian manicure style prep safely, effectively, and with expert precision. Here’s your full guide to prepping nails for Russian Manicure style prep, including why each step is so important.
Step 1: Wipe Away Oils & Cleanse the Natural Nail
Product: Lint Free Wipes
Before starting any prep, it’s essential to remove any natural oils, surface contaminants, or residue from the nail plate. Use a lint-free wipe soaked in isopropyl alcohol to thoroughly cleanse each nail. This ensures you’re starting with a clean, dry surface — crucial for adhesion and longevity.
Why it matters:
Natural oils can act as a barrier between the nail plate and your base products, causing lifting or poor adhesion. Starting with a properly cleansed nail helps ensure your Russian Manicure lasts beautifully and wears evenly.
Step 2: Remove Shine with a Gentle Buffer
Product: MUSE 180 Grit Buffer
Use a 180 grit buffer to lightly remove the shine from the natural nail. This step is crucial to allow your base coat or builder gel to grip the surface properly. You can also do this step with a sanding band and EFile.
Why it matters:
Skipping or overdoing this step can result in poor product adhesion or unnecessary damage to the nail plate.

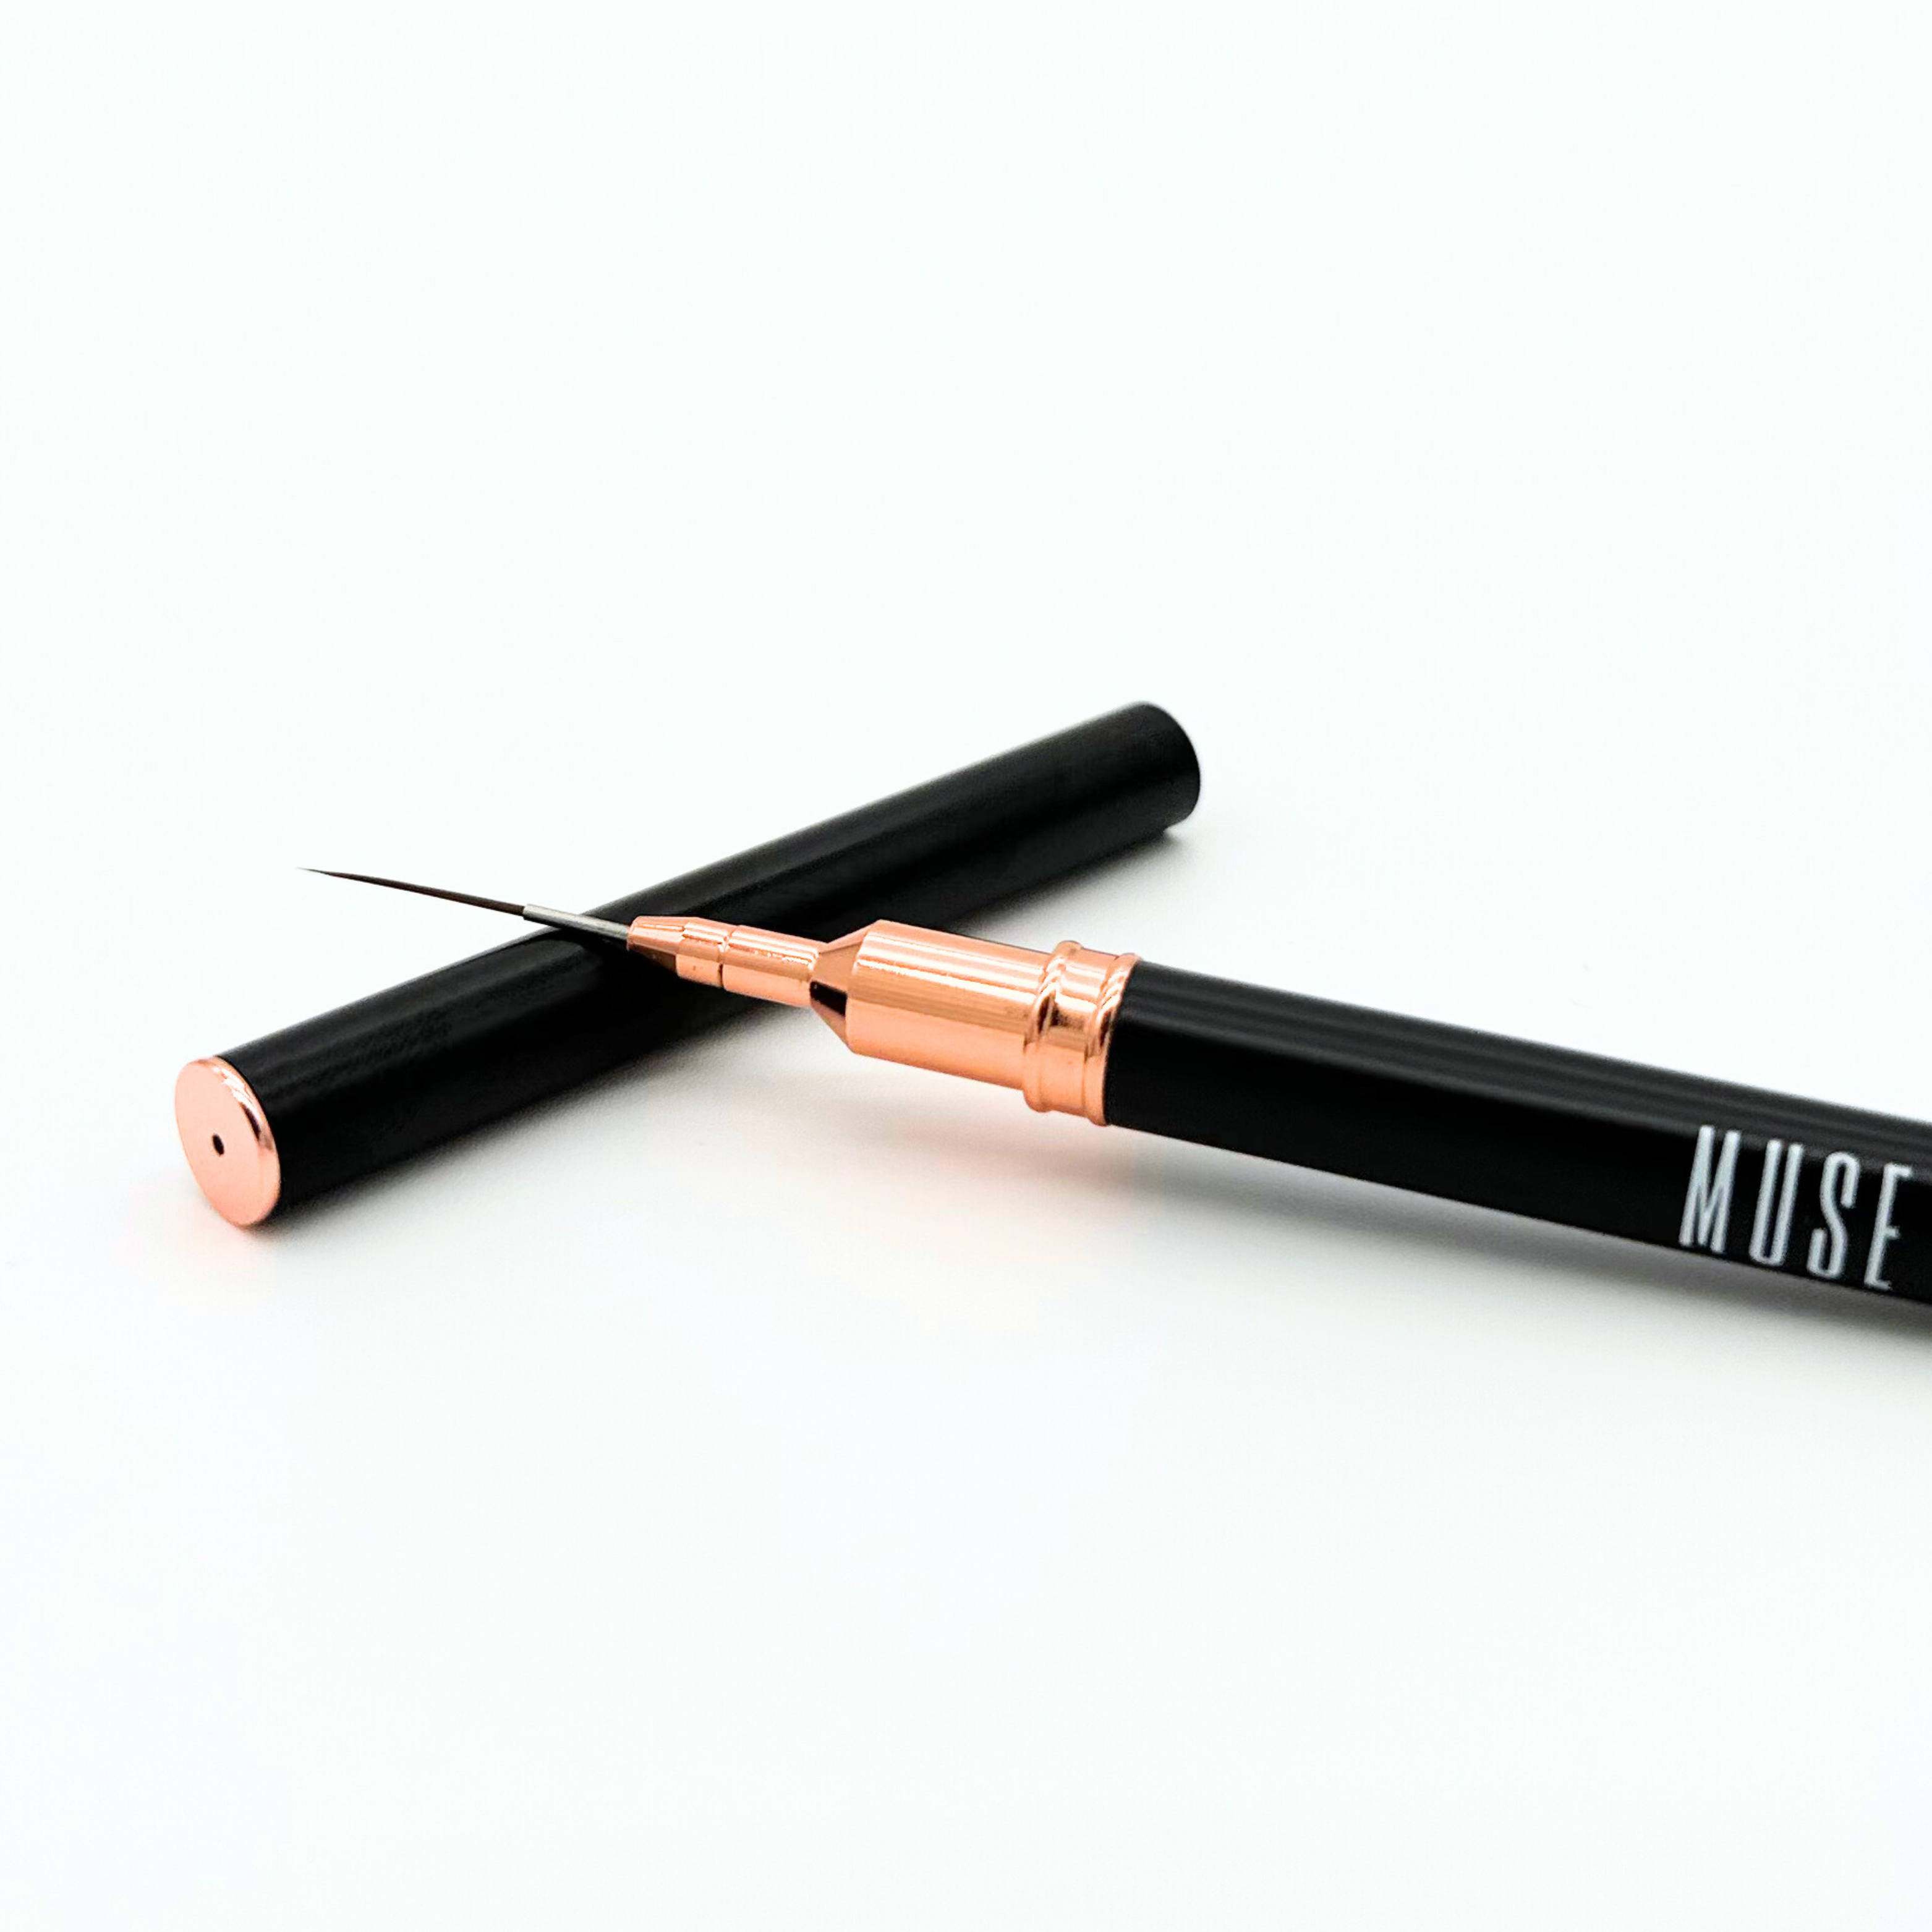
Step 3: Open the Cuticle Pocket with the Loop Tool
Product: Bevelled and Loop Tool
Now that the cuticle area is softened and prepped, it’s time to gently open the cuticle pocket. Start by using the bevelled end of your Loop Tool to carefully lift and expose the natural cuticle pocket without causing trauma to the nail plate.
Next, flip the tool to the looped end to scoop out any non-living tissue from inside the pocket. This allows for a cleaner surface and ensures no debris or dead skin is left behind—perfect prep for flawless product application.
Why it matters:
Properly opening the cuticle pocket and removing buildup is key to achieving that clean, flush cuticle finish Russian manicures are known for. It also helps prevent lifting and keeps enhancements from overlapping onto the skin.
Step 4: Shape the Nail
Products:
MUSE Reusable Metal File Base
MUSE Disposable Stick on Files
Use a reusable metal file base with high-quality stick on files to shape the nails to your desired length and form. Whether you're creating a coffin, stiletto, square, or almond shape, this step ensures the nails are even and polished.
Why it matters:
Shaping the nail properly before applying gel ensures a symmetrical, clean look. It also prevents discomfort or breakage during the wear of the manicure.
Step 5: Dry Cuticle Work with Your EFile
Products:
This is where the magic happens. Using your professional EFile and specially-designed bits, begin cleaning and exfoliating the cuticle area. The Russian manicure requires precision and care, and our tools are built to support that.
The Diamond Flame Bit lifts and separate the cuticle from the nail plate and for lateral fold cleaning
Why it matters:
Proper cuticle work allows for a closer, cleaner product application. This is what gives Russian manicures their signature “fresh for weeks” look, while also reducing the risk of lifting or irritation.

Step 6: Nip Away with Cuticle Nippers
Product: MUSE Cuticle Nippers
After EFile work, use your cuticle nippers to carefully remove any remaining excess cuticle and skin around the nail. This step ensures that the nail plate is clean and unobstructed for a perfect gel application.
Why it matters:
Nipping away leftover cuticle tissue allows the gel to bond more effectively with the nail, reducing the chances of lifting and giving a more polished, precise finish.
Step 7: Ball Bit – Exfoliate Remaining Tissue for the Airbrushed Look
Product: MUSE Big Diamond Barrel or Big Diamond Ball
Now, switch to your Big Barrel or Ball Bit to exfoliate the remaining tissue and polish the skin. This will provide the smooth, airbrushed look that Russian manicures are known for, giving the nail a perfectly refined finish.
Why it matters:
Exfoliating with these EFile bits, ensures that the cuticle area is fully polished, removing any fine skin or tissue that could cause product lifting. It leaves the nail looking smooth, clean, and ready for gel application.
Step 8: Dust Removal & Dehydrate
Product: MUSE Plush Brush & Lint Free Wipes
After EFile work, always remove all dust with a MUSE Plush Brush, and follow with another wipe using a lint-free wipe with isopropyl alcohol.
Why it matters:
Dust and debris can interfere with your base application and lead to lifting or contamination.
Step 9: Apply Your Product with Precision
Product: MUSE Brush Collection
Once your prep is complete, it’s time to apply your chosen gel or builder product. For a manicure that lasts, application technique is just as important as the prep.
Use a high-quality brush to level the product across the nail, paying close attention to the cuticle area. Build the perfect apex for both strength and structure—especially important for clients with longer nails or those prone to breakage.
Why it matters:
Using the right brush allows for smooth application, minimises bubbles or streaks, and helps you sculpt a flawless shape with ease. A clean apex not only gives a professional finish but also ensures enhanced durability and client satisfaction.
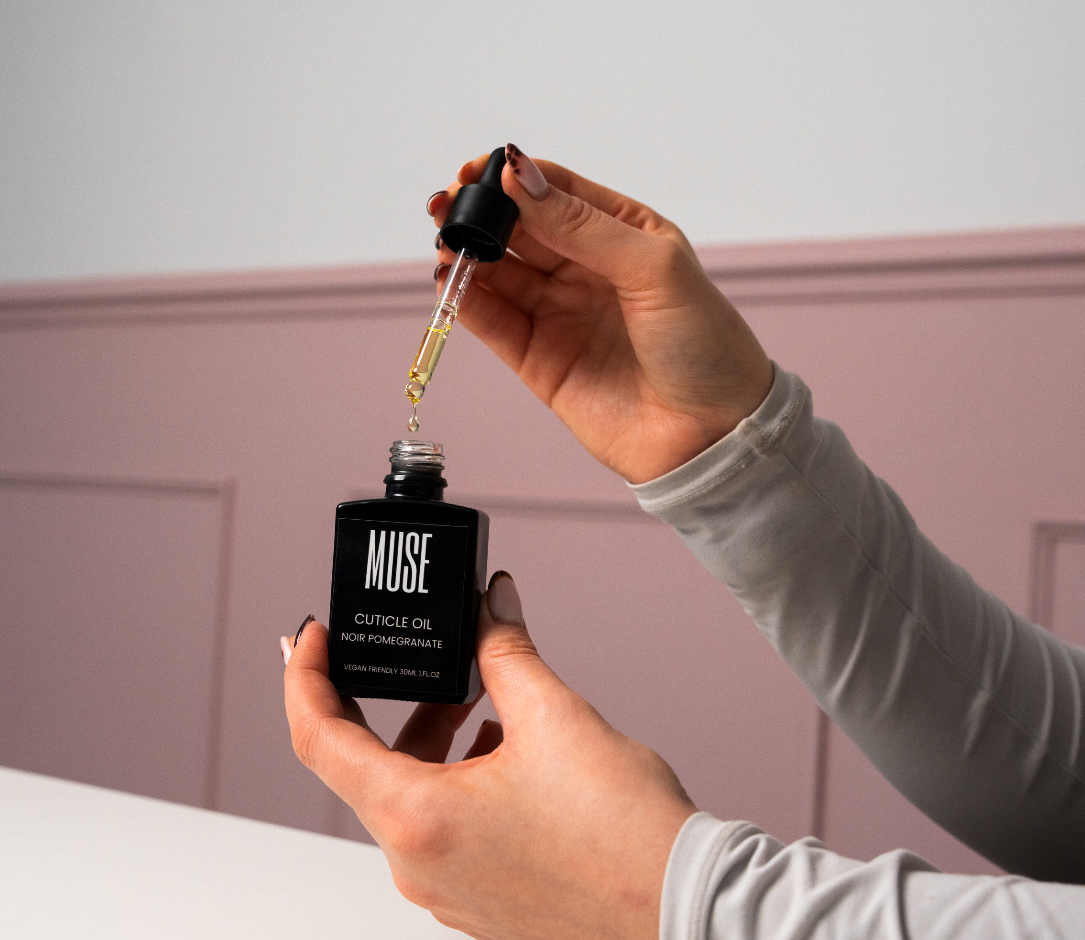
Step 10: Hydrate Cuticle Oil
Product: MUSE Cuticle Oil
After completing your prep, don’t forget to hydrate the cuticles. Use cuticle oil to nourish and replenish the skin around the nails, leaving them soft and moisturised.
Why it matters:
Hydrating the cuticle area helps prevent dryness and cracking, ensuring that the skin remains healthy, while also giving the nails a polished, finished look. This final touch enhances the overall appearance of the Russian manicure.

Final Thoughts: Why Great Prep = Great Results
Perfecting your Russian manicure prep using professional EFile tools and high-quality nail prep products will set you apart as a skilled nail technician. Not only does it enhance the overall look of the manicure, but it ensures longer wear, healthier nails, and better client satisfaction.
At MUSE, we’re proud to support nail techs with industry-leading EFiles, nail prep tools, and accredited EFile training courses designed to help you master every step with confidence.
Ready to level up your prep game?
→ Explore our full range of MUSE EFile tools and accessories.
→ Want to learn how to prep professionally? Train with MUSE Educate and get accredited with our in-depth EFile course.